EPA and Varmebaronen – Is it the end of the line?
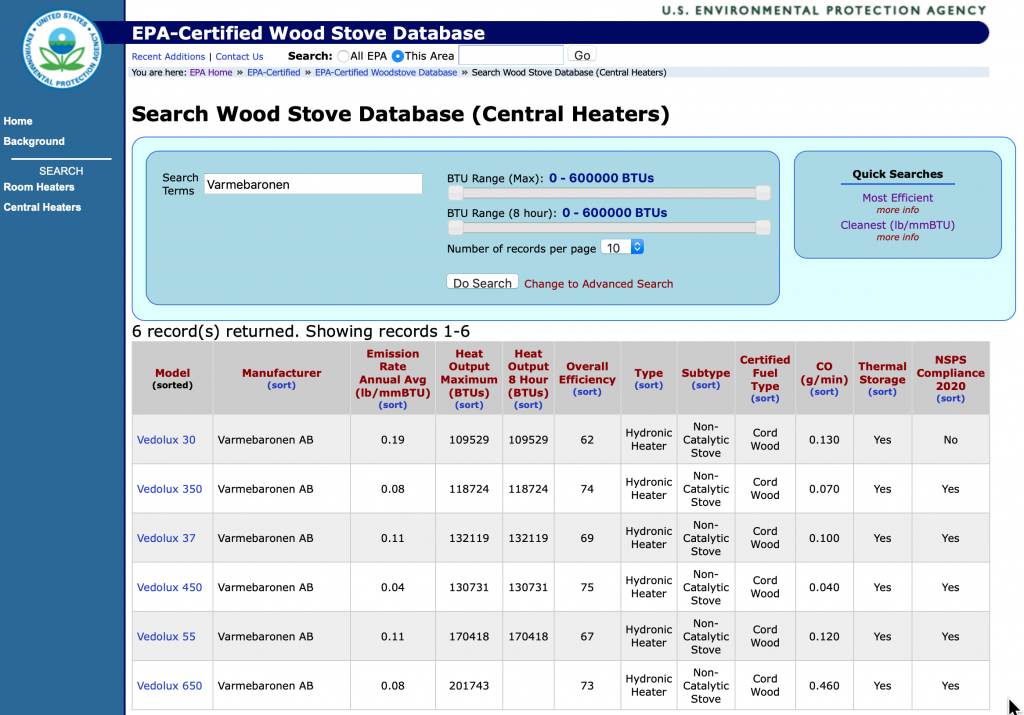
Varmebaronen was sent a letter from the EPA after they requested to renew their certificates for the Vedolux boilers. The letter was sent prior to the expiration of the certificate. The EPA reply letter gave 10 days to come up with a resolution to various deficiencies they found when reviewing the original test. The original …
EPA and Varmebaronen – Is it the end of the line? Read More »